Before making repairs in the room, it is necessary to familiarize yourself with the features of the process in advance, as well as carefully examine each stage. Thus, in this article we will consider the procedure for screeding and try to find out all the important points.

What should be the floor screed in the bathroom under the tile?
There are several varieties of execution depending on the material used. So, below are all possible options:
- For semi-dry applications, special aggregates are usually used. First, the solution is stirred, evenly distributed over the surface, and after drying, they are wiped to eliminate defects.
- Wet Filling is carried out in layers, and the actions themselves are carried out in several stages.
- In a dry screed, crushed stone and expanded clay are laid first, then everything is covered with a mixture.
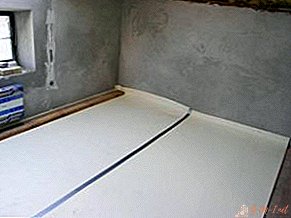
- National team. With this method, sheets or plates are laid out on top of each other in two rows, and glue acts as a fastening.
- Floating. The technology is presented in the form of bonding the main part with adjacent surfaces.
- The continuous method uses the usual mixture.
How to fill the floor in the bathroom under the tile
To achieve the result, you need to perform all the necessary steps, which are presented below.
Foundation preparation
Of course, first you need to at least eliminate all possible specks from the workspace. In addition, if there are cracks, they must be poured with a solution. Therefore, the prepared surface should ultimately be as flat as possible.
IMPORTANT. You need to make sure that the old floor is of high quality. Then you can primer the base.

Installation of waterproofing
The step is performed with the following sequence:
 The first action is applied bitumen mastic. With its help, corners, joints and the entire lower part of the walls are processed.
- After drying, lay the roofing material and roll it with a roller. As a result, all the material must be heated by the burner so that it is fixed.
- To protect the floor from moisture, it is necessary to use a coating. It can be both rubber and latex.
- After a few hours, you can re-process. REFERENCE! The direction of the brushes should be changed in the opposite direction. Next, you need to carefully cover the composition of the tape.
- After a day, it is advisable to make a screed. However, do not forget about the installation of beacons, as the procedure must be completed immediately before.
 The first action is applied bitumen mastic. With its help, corners, joints and the entire lower part of the walls are processed.
Pouring screed
In order not to get lost in the steps, a certain algorithm is provided:
- The mixture fits slightly higher than the level of the beacons. Then you need to evenly distribute the solution. Most often used sand-cement.
 The excess must be removed due to the rail, and the bubbles - using a roller with needles that are on its surface.
- After the solution has solidified, previously installed products can be removed. And fill the voids with the composition.
- It will take time for complete drying: from 10 to 40 days. Therefore, it is recommended to use quick-drying mixtures.
- At the time of drying, it is worthwhile to cover the floor with a film or cloth, which must be periodically moistened.
 The excess must be removed due to the rail, and the bubbles - using a roller with needles that are on its surface.
Thus, as you can see, any novice master can perform the procedure.
Leave Your Comment